
1. Filemanager initial Setup
- Setup path
- Setup client folder
- Setup folder structure
- Setup users
- Setup email
- Setup sync with cloud services
2. Setup Initial Path and profile Settings
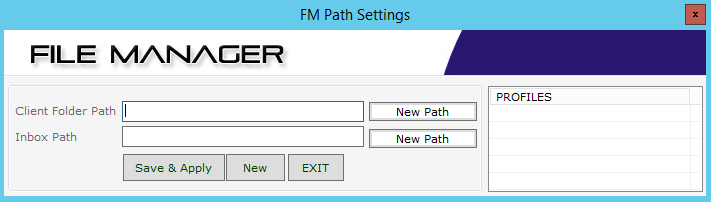
On initial startup, the application asks for the initial path settings for client folders and inbox.
(Or you can go to path settings by clicking the path settings button from the application toolbar.)

- First create a Folder (say Filemanager) using the windows built-in filemanager for the archive. Make sure the drive has enough free space.
- Open the Filemanager folder and create a folder named Client.
- Create another folder inside Filemanager folder and rename it (say for exampl Abcsoft). The name of this subfolder will also be the username for the filemanager.
- Open our File Manager application now.
- Click the New path button to setup Client folder path.
- Browse and select the path of the first folder (the one named Filemanager).
- Now click the New path button to setup Inbox Path.
- Browse and select the path of the subfolder (the one named Abcsoft) and click the ok button.
- Click the save & apply button, and enter a name for the profile.
The saved profile will be listed in the profiles section. Filemanager can have multiple profiles saved using different path settings for client and inbox folders
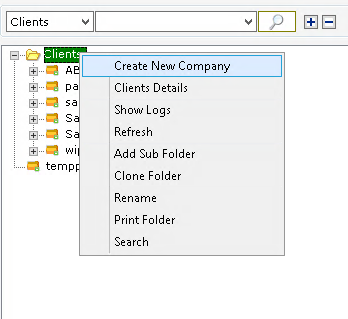
3. Create client folders/archive
- Right click the Clients folder in the left side pane.
- Select Create New Company
- Enter the client name and click create button
4.Default client folders (folder structure)
In file manager each client has a separate client folder where the client’s file will be archived.

- Click the User settings button, a new window named FM-Master will appear.
- Select Default folder tab
- Input a New foldername (say Download) and click the add button
- Similarly create another one (say Upload) and click the add button

We recommend using the above folder structure, which allows syncing files through “My Business App” our cloud file sharing platform.
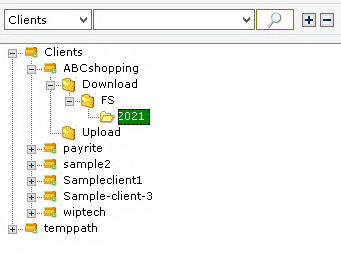
Now while creating the archive folder for new clients (here Sampleclient1) the default folder structure will be automatically created (Download and upload folders).

5. Print or scan to inbox
All client files, say photocopies/scanned files, pdf, excels, word documents, email messages, scanned images etc. are made available directly in the File Manager inbox with one click print feature.
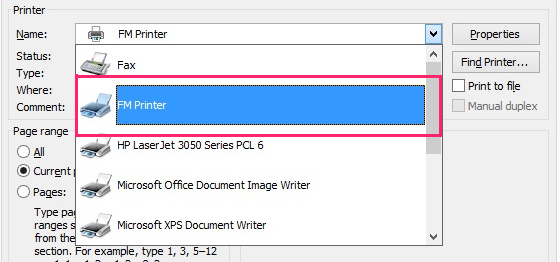
- Select the file or message and click print. A printer dialog box will appear.
- In the printer dialog select FM printer
- Select the page ranges if necessary and click print
The printed file will be readily available for archiving, sharing with users, email etc in the File Manager inbox.
6. Archive Client Files:-
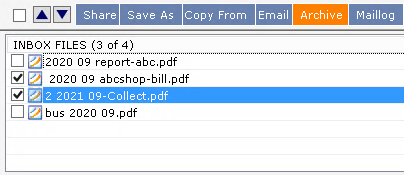
- Select the client folder in the left side pane
- Now tick the checkbox
 to select the files in the inbox
 - Click archive button
Now the archive can be verified in the client files viewer pane. (see figure below)

7. Manage archives
In filemanager archives can be structured by creating folders and subfolders in a tree fashion.
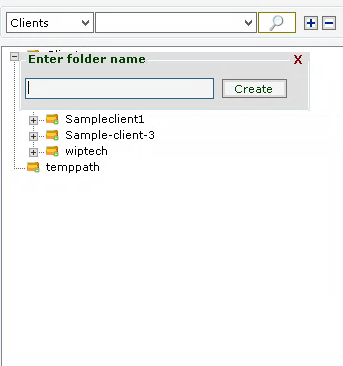
Clone folder:-
- Right click the folder to clone and select Clone Folder in the menu.
- Input the name in Enter folder name and click create button
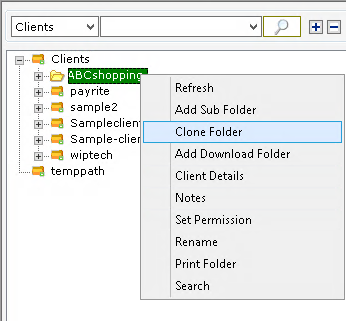
This way the folder structure will be cloned recursively with all the subfolders. (excluding all pdf and other files in the archive).
Other file operations such as copy to inbox, rename, status, save to disk, email, move document, add to composer etc are available
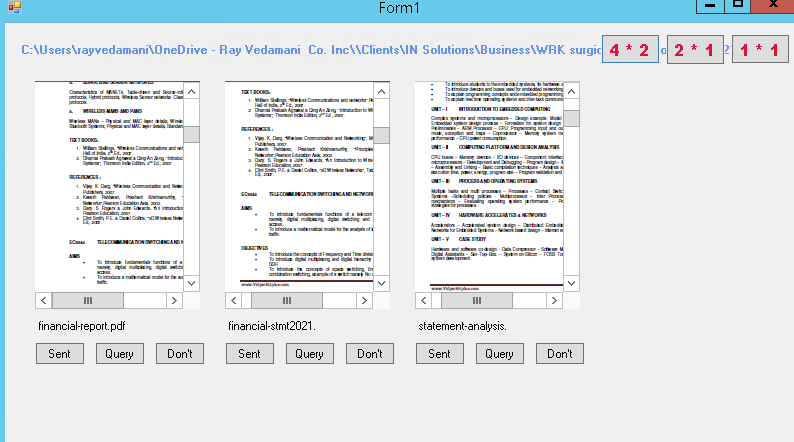
8. Preview archive files

- Select the client and browse to the required folder
- All the files in the particular archive will be displayed in the client files pane
- Click the dropbox icon
- Choose the view type (4x1 or 2x1 etc.)

The files will be displayed as thumbnails which makes visually finding the files easier.
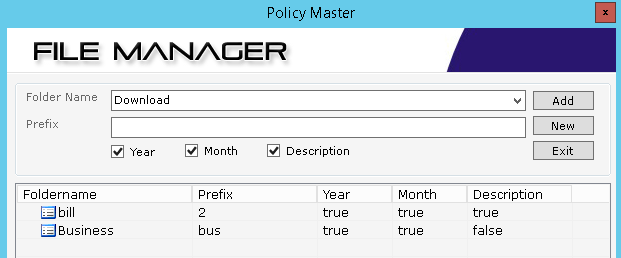
9. File naming policy
- Click the policy settings button
- Select the Folder Name from dropdown (say Download folder)
- Tick the checkboxes year, month, description as required
- Click Add button

After adding the policy whenever a file is archived to the specific folder described in the policy master, the prescribed rules will be used to rename the files.
- Select the folder
- Select the files using checkboxes in the inbox and click the archive button
- A renaming dialog will appear
- Enter the year, month and description for the file
- The file will be renamed and archived
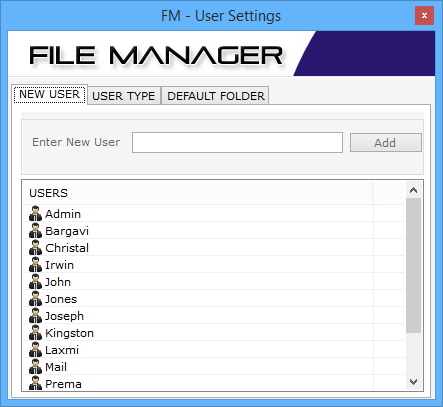
10. Adding a New User
- Click the User settings button, a new window named FM-User settings will appear.
- In the FM-Master (FM-user settings) window, fill the name in the Enter new user text box, and click the Add button.
- Now goto admin settings and set usertype and permissions for the users.. See user permission settings.

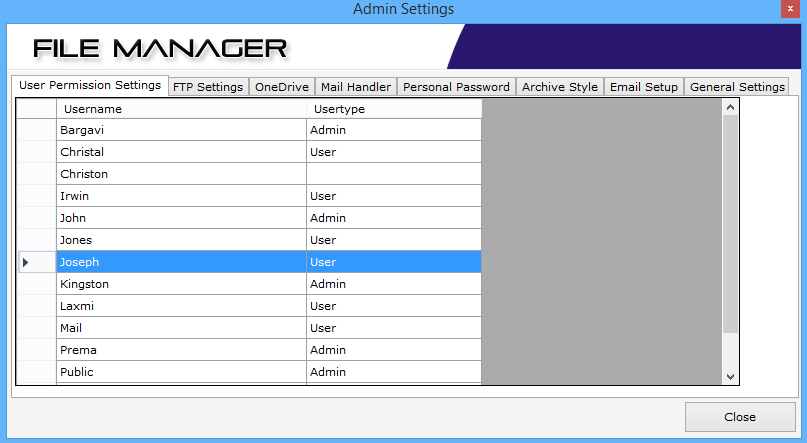
11. Change User Permission Settings:
- Click the admin settings button. The admin settings window will appear.
- Click the user permissions settings tab. The list of all usernames and the available user types are displayed.
- To change the user type, double click on the user type for the appropriate user. A combo box is shown.
- Select the appropriate user type and click anywhere on the window. The user type will be changed.
- Only admins can change the permissions for all users.

12. Create, rename or delete Sub Folders for All Clients
Suppose there is a need to create folders in bulk, say to create a folder with specific name under each client, filemanager has the provision to do that.
-
- Click manage subfolders button
- A new Admin Settings window will appear


- To Create a Sub Folders inside each Clients’ folder
- select the Sub Folder for all tab (say FS folder in Download)
- Click Browse folder
 and select the set root folder.
 - input the folder name in New folder name and
- click the create button.
- To rename a subfolder in all clients,
- click the Rename Sub Folder tab in the window Admin Settings.
- Click Browse folder and select the set root folder.
- Select the old folder name to be renamed in the combo box.
- Enter the new folder name and confirm it.
- Click the Rename button. The folder selected in the dropdown box will be renamed to the new name entered in the textbox.

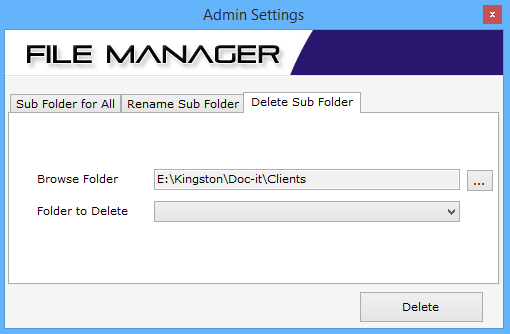
- To delete a sub folder in all clients,
- click the Delete Sub Folder tab in the Admin Settings window.
- Click Browse folder and select the set root folder.
- Select the folder to delete in the combo box.
- Click the Delete button and the folder will be deleted.
13. Advance file Search option
- Click the Search File Name Button. A new window named Filename Search will appear (or right click on the client folder in the left side clients list pane and click search. See figure below)

- Select the client and enter the file name in the filename textbox,
- Select the from and to date and click the search button. The file names will be listed in the list view. Click on the file for a quick preview

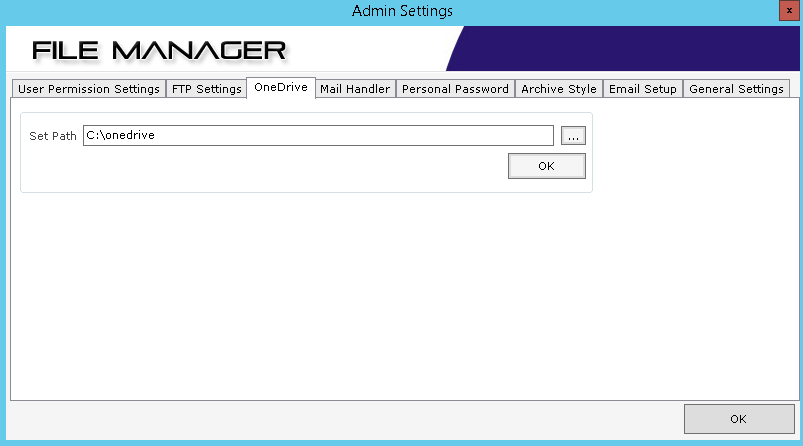
14. Setting up sync and share to cloud (One Drive, dropbox)
- Click the admin settings button. The admin settings window will appear.
- Click on one drive tab
- Select the browse button and select the folder in the computer that syncs with the onedrive cloud service
- Click on save button
Note: FTPsettings tab also can be configured in the same way, which can be used for file transfer using ftp clients or use it for other services like dropbox, google drive etc.
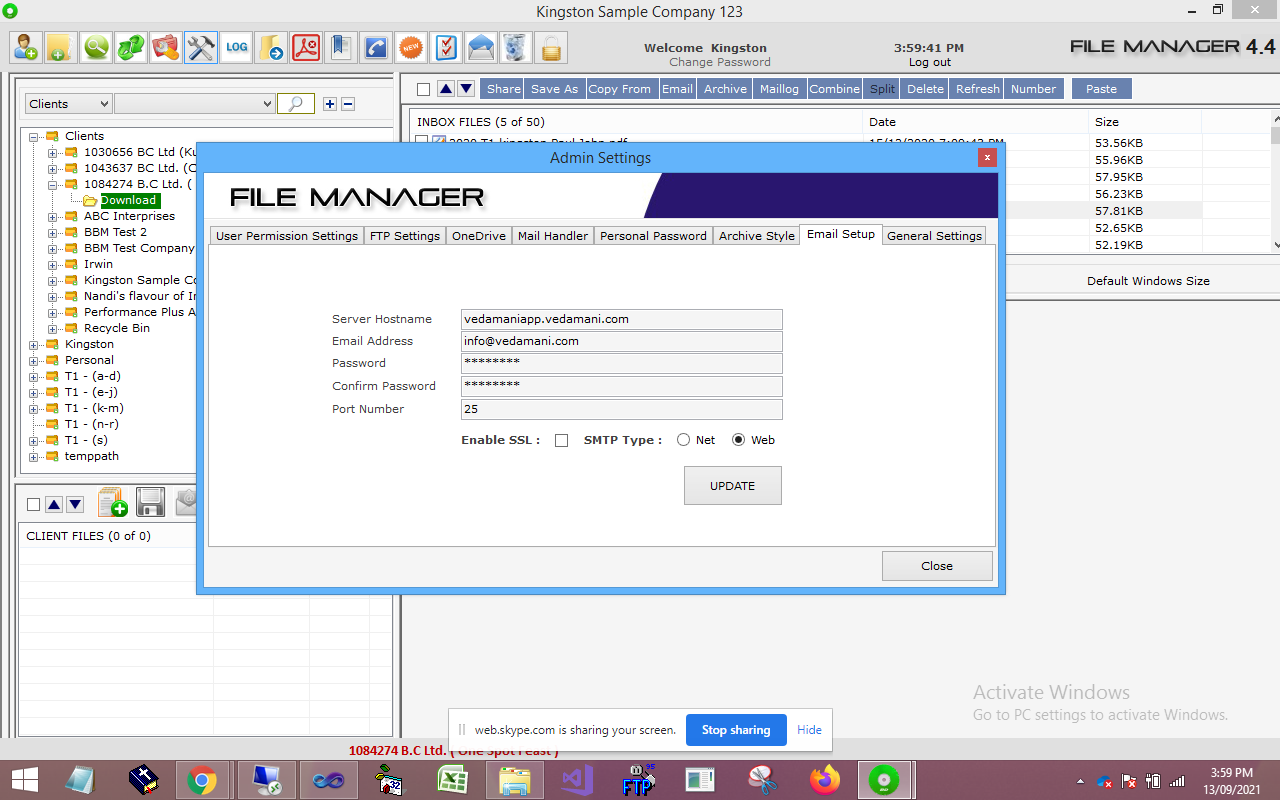
15. Setup Email in filemanager
Filemanager has provision to send documents in inbox or archive through email
- Click the admin settings button. The admin settings window will appear.
- Go to email setup tab
- Fill in the details such as server hostname, email address and password.
- Click update button to save the settings
16. Send Email from filemanager
- Goto inbox or archive files viewer
- Select the files to send using the checkbox
- Now click on the email button
- Now select fm mail in the menu
- A dialog window will appear
- FIll in the send To email address
- And click send button

17. Split, combine or remove pages in pdf documents
- Delete unwanted Pages from the document
- Select the file (tick the checkbox)
- Click delete pages button. A dilaog will appear

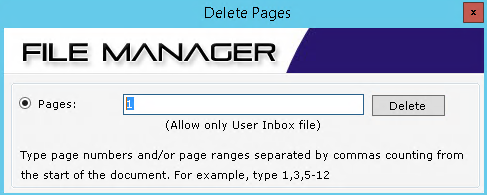
- Now enter the pages that has to be removed
- And click the delete button.
- Combine multiple documents
- Select the files in the inbox (tick the checkbox)
- Click on the combine button and select where to save the combined document (inbox or local drive).

- Now enter the file name for the combined document in the Enter file name text box.

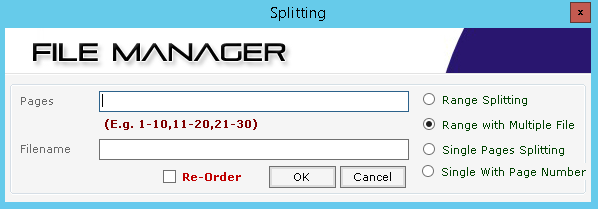
- Splitting documents
- Select the files in the inbox (tick the checkbox)
- Click on the split button and select where to save the combined document (inbox or local drive). A dialog will appear.
- Select the splitting type, enter page rage and filename.
- And click ok button.
Range Splitting : split pages in the range say 1-10
Range with Multiple Splitting : specify range as 1-5,6-10,11,13-15.
Single Pages Splitting : split each page to a separate files
Single with page number: split pages to separate files and custom rename
18. View activity logs from all users
- Click on the FM log button.
- All the activities taking place in File Manager such as sharing files, archiving, files coming to inbox, emails etc are recorded and displayed.

It also facilitates searching for activities based on Folder Group, client name, Username, action and date.
19. Setup Task responsibility
- Click the admin settings button. The admin settings window will appear.
- Click on the Task/mail Handler tab. The list of tasks will be displayed.
- Select the task name, double click and select the user responsible for the task.
Personal Password: - The personal password tab in admin settings is used to create password for each user. It works similar to task handler. Double click the password field to set up a new password.
Archive Style: - The archive style tab in admin settings is used to set the archive method. There are two types of archive. Quick archive enables drag and drop function. Whereas classic archive style uses the old traditional way to move files to the archive.
Application Refresh: - The Application Refresh button is used to refresh the entire File Manager Window.
